Introduction
Welcome to SchoolAssist. This guide explains how to configure and manage the SchoolAssist Alert Display system using the Admin Panel. You will need a valid username and password to access the Admin Panel.
Accessing the Admin Panel
The SchoolAssist Admin Panel is accessed through a web browser on any device connected to the same local network as the SchoolAssist Hub. To access the Admin Panel, use the link
http://<server>:<port>/
Replacing <server> and <port> with the IP address or hostname and port (which defaults to 80) of your SchoolAssist Hub e.g.
http://192.168.100.55:80/
or
http://schoolassist.myschool.ac.nz/
Most SchoolAssist Hubs can also be reached on a local network name such as salcomassist.local : check with your System Installer or Site IT Support team for more details.
Logging In
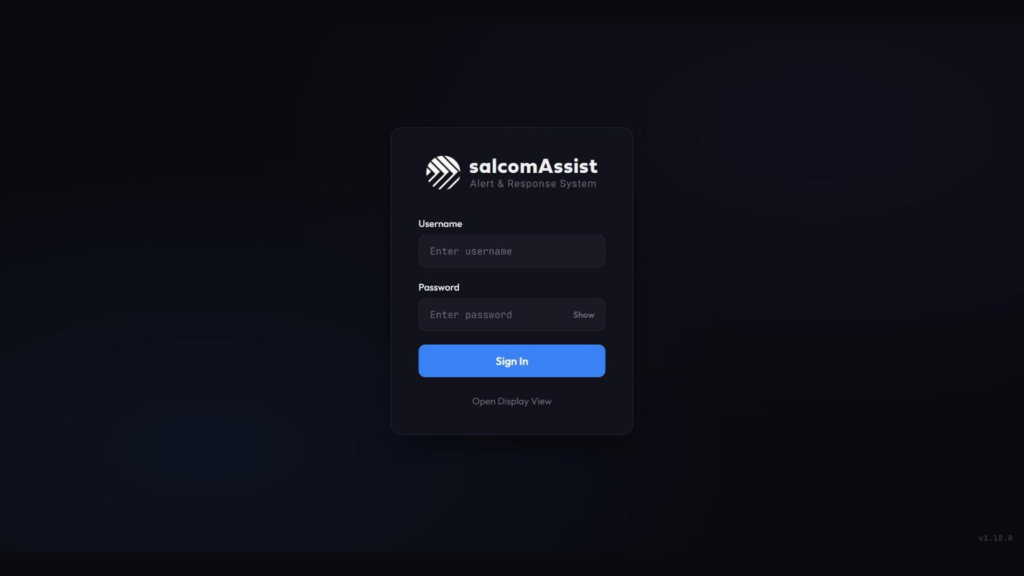
Once you have opened the Admin Panel in your browser you will be presented with a login screen. Enter your username and password, then click Sign In.
Note that:
- Each staff member can have their own named login (see Users, under Settings) so that actions are recorded against them individually rather than a shared account.
- If you are using the built in
adminaccount for the first time, the default credentials areadmin/admin. Change this immediately after signing in from Settings > General.
Admin Panel Overview
The Admin Panel is the central management interface, shown in-app as System Configuration. It is organised into six tabs across the top: Alert Devices, Maps, SMS Alerts, System Check, History, and Settings (described in the following sections).
The header bar is always visible on every tab and shows:
- The cellular signal indicator (network name and connection type, e.g. One NZ / LTE CAT-M1) for units with the SMS gateway.
- The logged-in username, with a dropdown for Change Password and Logout.
Alert Devices Tab
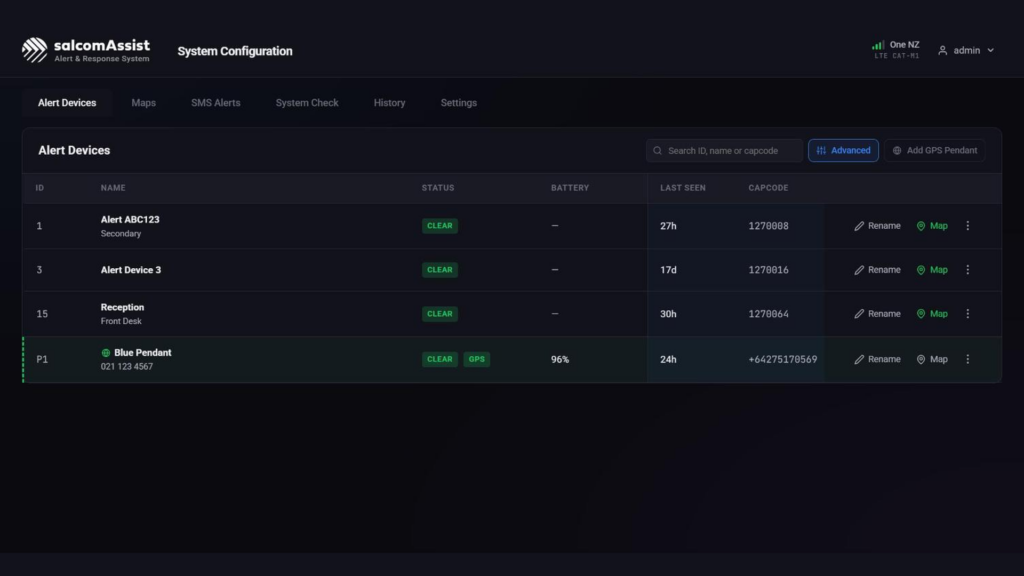
The Alert Devices tab displays a table of all registered callpoints and GPS pendants. Devices appear here automatically when they first send a message to SchoolAssist.
- By default the table shows ID, Name, Status, and Battery
- Devices are sorted with active alerts at the top, followed by low battery warnings, then by device ID
- Click Advanced to also show Last Seen and Capcode (for GPS pendants, this column shows the pendant’s phone number instead).
- Use the search box to find a device by ID, name, or capcode.
Renaming a Device
Give each device a meaningful name so it is easy to identify on the display (e.g. “Level 2, East Wing”).
- Click Rename on the device’s row.
- Enter an Alert Device Name (the primary name shown on the display).
- Optionally enter a Secondary Name (shown as a subtitle).
- Click Save.
Placing a Device on a Map
To specify the physical location of wall-mounted Callpoints:
- Click Map on the device’s row. This opens a full screen map picker.
- Choose a map from the thumbnails along the top (you must upload maps first, see the Maps Tab section, below).
- Click on the map image to place the pin at the correct position. Use the zoom controls or Fit to adjust the view.
- Click Save. To remove a pin, open the picker again and click Remove from Map.
Clearing a Low Battery Warning
If a device reports it’s battery is low, a Low Battery icon will appear on the main Alert Display screen. A Clear Battery button also appears here in the Alert Devices tab. Once the battery on the device has been replaced, click this button to remove the the Low Battery warning.
Clearing an Active Alert
If enabled for your system, any device which has an active alert will appear here with a Clear Alert button on its row. You can click this button to remotely clear the alert instead of having to press the physical Cancel button on the device.
Important!: Always make certain that the reason for the original alert has been resolved before clicking Clear Alert!
Blocking or Deleting a Device
If a device needs to be removed from the system (e.g. it has been replaced, or has been lost) then click the ⋮ menu on a device’s row, and then:
- Click Block to keep the device configured in the system but suppress all future alerts from it (useful for temporarily removing an alert device).
- Click Delete to remove it entirely. This will remove all of its setting, including its Name and Map location
Adding a GPS Pendant
Click Add GPS Pendant to register a licensed 4G GPS pendant.
- Enter a Name and an optional Secondary Name.
- Enter the Pendant phone number. SchoolAssist needs to know to expect messages from this phone number.
- Enter the Pendant password, if one has been set on the pendant (it ignores commands sent without it).
- Leave Set up this pendant now ticked to request that SchoolAssist automatically configures the Pendant for use.
- Click Add GPS Pendant.
- If you ticked Set up this pendant now, SchoolAssist will now communciate with the pendant to configure it for use. This process can take several minutes.
Tip: When naming a GPS Pendant, enter the Pendant’s phone number as the Secondary Name. Then when the Pendant is activated, this phone number will appear in all Alert Notifications, making it easier for end users to call it if required.
Once registered, a GPS pendant raises an alert by text message from anywhere with mobile coverage. Its row also shows a GPS badge and when activated, its alert cards on the main Alert Display include a link to the pendant’s live location.
Maps Tab
The Maps tab lets you upload floor plan images used to show the physical location of devices on the Alert Display and in the device Map picker.
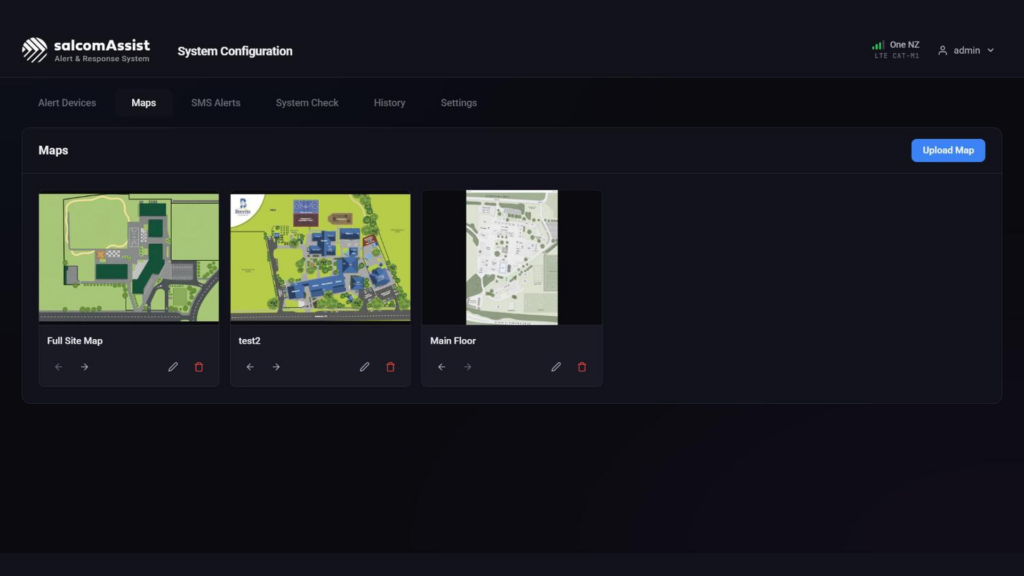
To upload a new map:
- Click Upload Map.
- Enter a name and choose an image file.
- Confirm the upload.
Uploaded maps appear as cards as shown above. Use the ← and → arrows on each card to change the order of the maps, as this controls the order they appear throughout the rest of SchoolAssist. Click the Edit icon (the pencil) to rename a map, or the Delete icon (trash can) to delete it.
Warning: Deleting a map also removes the location information for any Alert Devices that use that map.
SMS Alerts Tab
If enabled for your system, the SMS Alerts tab manages who receives text (SMS) messages to their phone when Alert Devices are activated. Each contact has a name and phone number, and two notification types you can tick independently:
- Alert: texted the moment an alert activates and again when it clears.
- Maintenance: texted operational notices, such as connectivity issues.
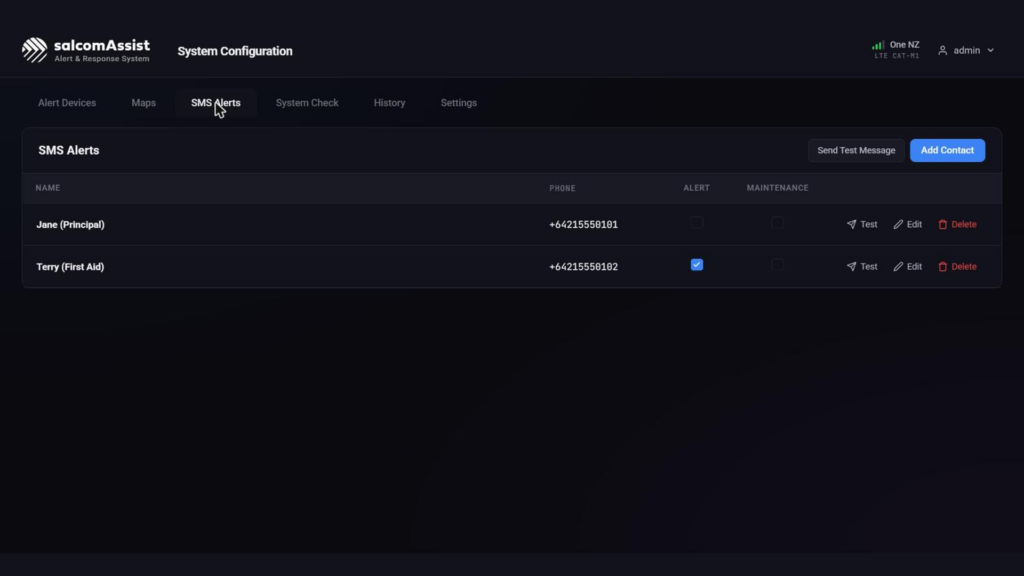
To add a new SMS recipient (“contact”):
- Click Add Contact.
- Enter a Name and Phone number.
- Tick Alert and/or Maintenance.
- Click Add Contact.
Use Edit or Delete on an existing contact’s row to change or remove it, and Test sends that contact a single test message. Send Test Message (top right) sends one to everyone on the list, so you can verify that the sending of SMS messages is working without raising a real alert.
Note: For SMS message sending to work, the SIM card installed in the SchoolAssist Hub must have available credit
System Check Tab
The System Check tab provides a structured workflow for physically testing every registered Alert Device to ensure they are all working and then generating a summary report for later audit purposes.
Important!: Performing a System Check will disable all live alerting! Only perform a System Check when no genuine alerting is required e.g. outside of normal school hours.
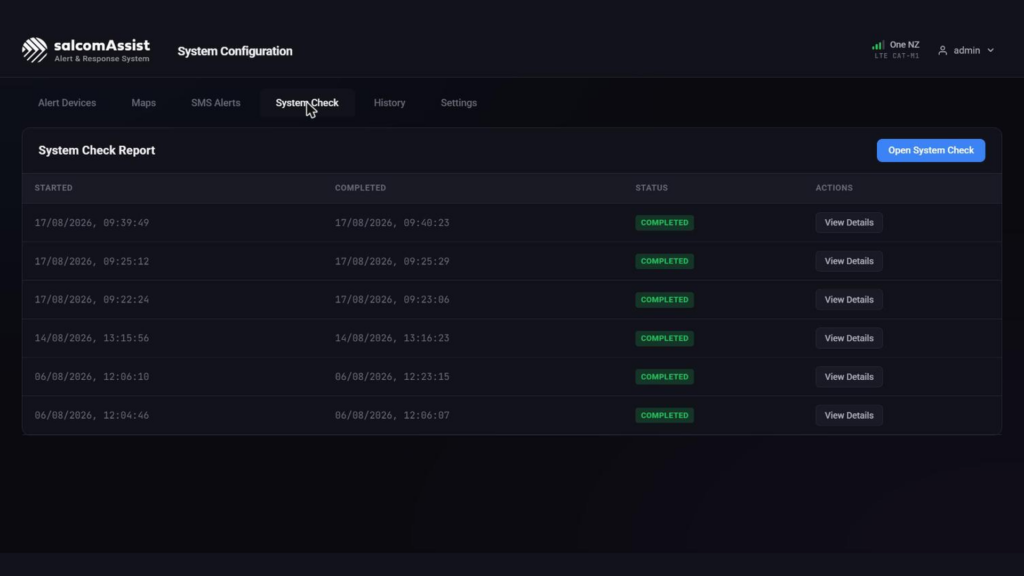
The System Check tab, with a history of completed checks.The System Check process is best performed by walking around the site with a mobile tablet or laptop connected to SchoolAssist via the site Wi-Fi network. This will let you check and correct any details as part of the process, rather than having to note any required changes down and amend the system configuration only when you later return to the office.
Starting a System Check
- Click Open System Check. This opens a dedicated full-screen page.
- Click Start System Check Report. Live alerting is disabled for all devices while a check is in progress, so only start one when no genuine response could be needed.
- Using the displayed Map, walk to the first Alert Device and press it’s Activate button.
- A popup window appears allowing you to review and (if required) amend the name and location of the Alert Device
- The system also requires you to press the device’s Cancel button and verify that its Responding LED signals work correctly, and a device is considered fully tested only once all three have been received.
- Once you have completed the checks for that Device, you can optionally enter a Note and specify if the device has passed all its checks or not
- Use the Map to guide you to the next Alert Device to be checked and repeat the steps above
- A System Check can be paused at any time before all Alert Devices have been checked, and then later resumed. When a System Check is paused, the system returns to normal operation
- Once all Alert Devices have been physically checked you can complete the System Check process, including recording the name of the person who performed the check and any overall notes or comments.
- Once the System Check is marked as complete, the system returns to normal operation and live alerting will be enabled again.
Viewing Past System Check Reports
Back on the System Check tab, the System Check Report table lists every past check with its start and completion time and status. Click View Details on any report to see:
- Tested / Pending / Total counts and a progress bar.
- Who completed the report.
- A per-device breakdown with a checkmark for each signal received.
Click Export to CSV on a report’s detail view to download its results.
History Tab
The History tab is a complete, filterable log of every event on the unit: alerts, cancellations, responses, battery warnings, logins, GPS pendant activity, system events, and configuration changes. Each row shows Time, Type, Message, User (for admin actions), Alert Device Name, and Alert Device (ID).
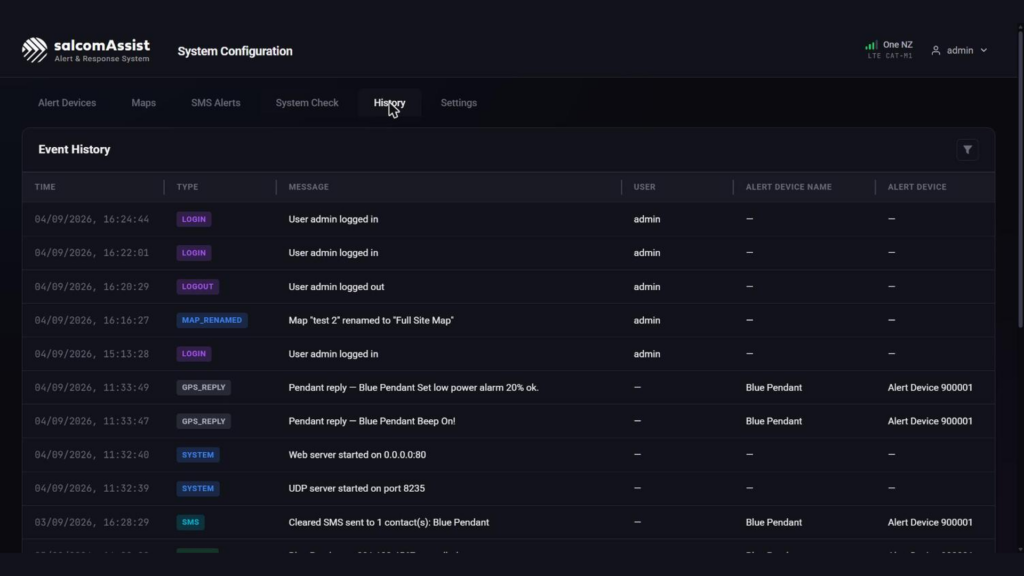
Click the filter icon (top right) to reveal the filter toolbar:
- Callpoint: filter by device ID or partial name.
- Event Type: filter by event type.
- Date Range: restrict to a from/to date.
- Sort By and Order: choose the sort column and direction.
Click Reset to clear all filters, or Export to CSV to download the currently filtered list.
Settings Tab
Settings is organised into 6 sub-pages as shown on the left-hand menu: General, Time, Users, Network, System, and Licence.
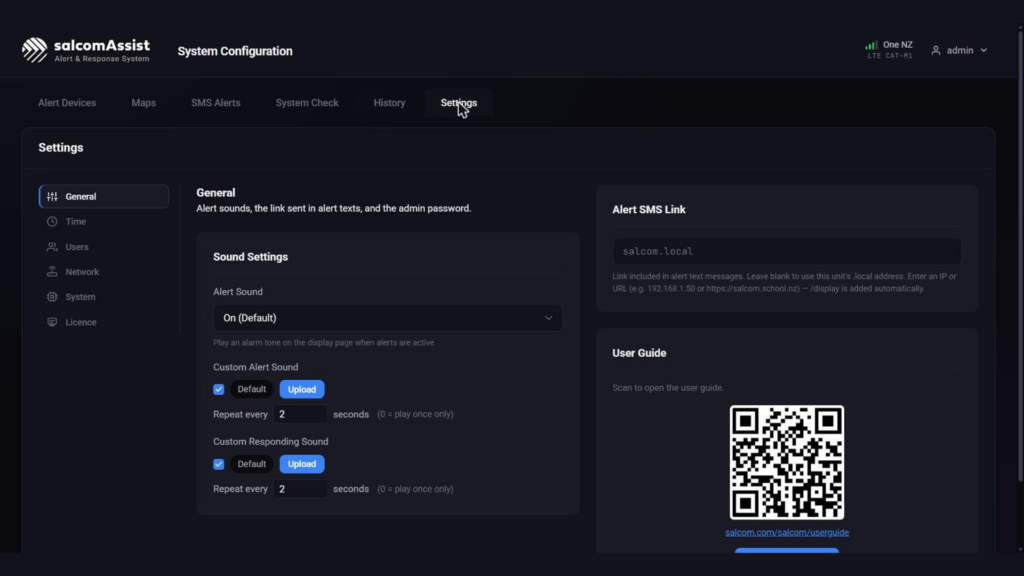
General Page
- Sound Settings: turn the alert and responding sounds on or off, upload custom sounds (MP3, WAV, OGG, or M4A), and set how often each sound repeats when an Alert Device is activated or somebody indicates they are responding.
- Alert SMS Link: specify the link to SchoolAssist that is included in text messages when an Alert Device is activated or cancelled. Leave blank to use the unit’s default
.localaddress. - User Guide: a QR code and short link (
salcom.com/salcom/userguide) to the public user guide, with a button to download the QR code image.
Time Page
- System Clock: shows the unit’s current time and timezone. Set the date and time either
- Automatically (via an internet time service, falling back to the cellular network) or
- Manually. A custom time server can be entered.
- Time Format: 12-hour AM/PM (default) or 24-hour, as shown on the public Alert Display.
Users Page
Lists every account that can sign in, its status (Enabled/Disabled), and its type (BUILT-IN for the default admin account, STAFF for named site administrator accounts).
- Add Account creates a new named login with a username, password, and the specific set of functions that this user can perform e.g. manage text contacts, rename devices etc. Note that some functions are only available if enabled at your site.
- Edit Permissions on an existing user opens the same list of functions to adjust what that person can do.
- Change Password resets an account’s password (resetting someone else’s password requires you to re-enter your own as confirmation).
- The ⋮ menu offers further account actions (e.g. disable).
Network Page
- Ethernet and Wi-Fi panels show connection status, IP address, and MAC address for each interface.
- Names and Ports lists the unit’s local network alias (e.g.
salcomassist.local), its UDP server port (for callpoint hardware), and its web server port (for browser access). - Available Networks lets you scan for and join a Wi-Fi network, including hidden networks.
System Page
- System Information shows the installed software version, the unit’s Hardware ID (used for licensing), and its Unit Phone Number (the number alert texts arrive from).
- Setup Backup: Save Setup downloads the full site configuration (devices, settings, maps, sounds) as a single file; Load Setup restores it. Useful for pre-configuring a replacement unit.
Licence Page
- The Licence section shows the site’s Licence type and Hardware ID, a field to activate a New Licence Key
- Licensed Features shows the list of all available SchoolAssist features with an indication of which of these are enabled for your site.